The term “Debugging” sounds a little complex when you read it as a non-technical user. Working with Android phones is easy, but you may face issues when handling complex operations. What is debugging, and how do you enable USB debugging? As an Android user, you must study this term in detail and discover the advantages and disadvantages of turning on this option on your device. Is it an easy process? Whether it involves any technical codes to enable this debugging mode? Surf the below content to get a quick synopsis of USB debugging and the best methods you can adopt to perform the task. Are you ready to take off on your enlightening journey about the sophisticated ways of USB debugging?
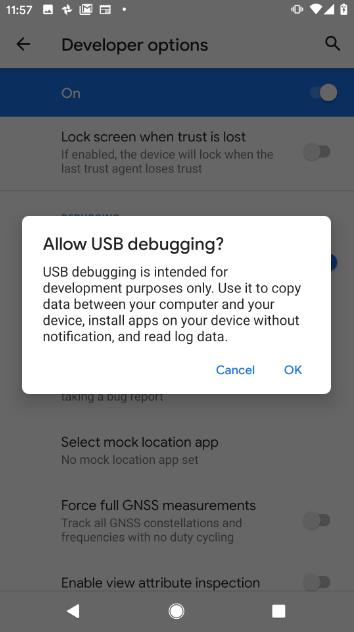
Part 1: What Does USB Debugging Mode Do?
Many Android developers are familiar with the term USB debugging. It is the method of rooting your Android phone to push apps and other data to external devices like PC. When you want to develop apps, you must enable this option and move the APK files into the system to proceed with the testing process. Moreover, when you access larger files, manual file pushing seems tedious and not recommended. When you root the phone, the device will be ready to connect with other electronic devices effortlessly.
Part 2: Common Method to Enable USB Debugging on Android Devices
In this section, you will learn about the technique to enable USB debugging on Android devices.
First, you must know how to enable the developer option on your Android phone. The lower Android version displays the developer option page by default. In the case of higher versions like 4.2 and above, you must enable this option by performing a few clicks on the device. Follow the below steps to activate the developer option and turn on the USB debugging mode on your Android phone.
Step 1: Go to the Build number in your phone by navigating Settings -> About Phone -> Software Information -> Build Number.
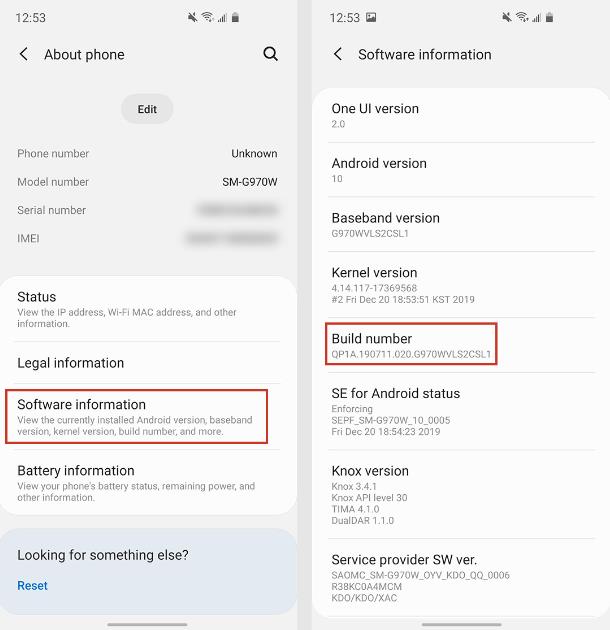
Step 2: Click the Build Number seven times, and you will witness the message “You are now a Developer”. You have enabled the Developer option and go back to the previous display to view the turned-on toggle switch of the Developer option.
Step 3: Next, reach the USB debugging mode by tapping Settings -> System -> Advanced -> Developer Options -> USB Debugging.
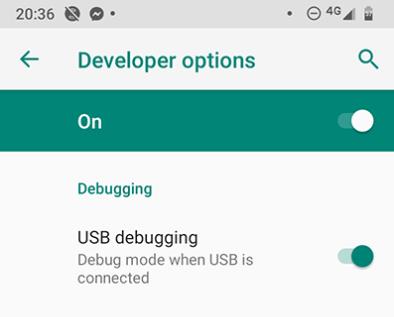
You have now successfully switched on the USB debugging mode on your phone. The device is ready to communicate with the PC to perform desired activities. It is the usual way to turn on the debugging option on your phone. Surf the steps carefully and enable it based on your Android OS version.
Part 3: How to Enable USB Debugging on Android with Broken Screen
If your Android screen is broken, you must look for other options to enable USB debugging. The broken screen prevents accessing the menu on the phone. It is tough to turn on the debugging mode like the normal working condition of the phone. Here, you will get a quick synopsis of the best technique to activate this mode when there is less accessibility feature with the gadget. The OTG cable attached to the mouse will help you to navigate the phone options effortlessly. If your device screen is still working, use the below steps to perform the debugging activity.
Step 1: Use a reliable OTG adapter and connect your phone to the mouse. Next, unlock your device by making a click on the mouse.
Step 2: Now navigate Settings -> About phone -> tap the mouse seven times on Build Number -> Developer option.
Step 3: Attach your phone to the PC using a USB cable and access the device memory via computer. Open the folders on your gadget and access the files to perform the copying action.
Part 4: How to Enable USB Debugging on Android with Black Screen Using ADB Command
When your phone screen goes black, you can enable USB debugging from your PC. You must switch your phone to recovery mode and use ADB commands. Follow the below steps carefully to activate the debugging on a black-screen phone. Please note that this method only works on Android devices with unlocked bootloader.
Step 1: Download the ADB toolkit on your PC and extract the files.
Step 2: Then, press the Volume down and Power buttons to push your phone to recovery mode. Attach your phone to the PC using a USB cable.
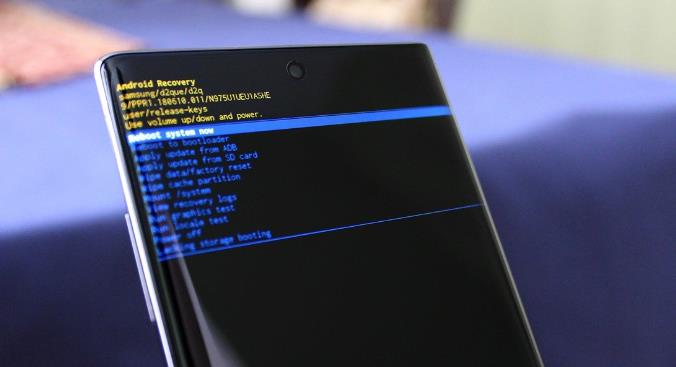
Step 3: Next, tap Platform Folders from the extracted files and disclose a command window by clicking File -> open Windows Power Shell or hit the Command Prompt window on the ADB folder and enter the following command:
- adb devices
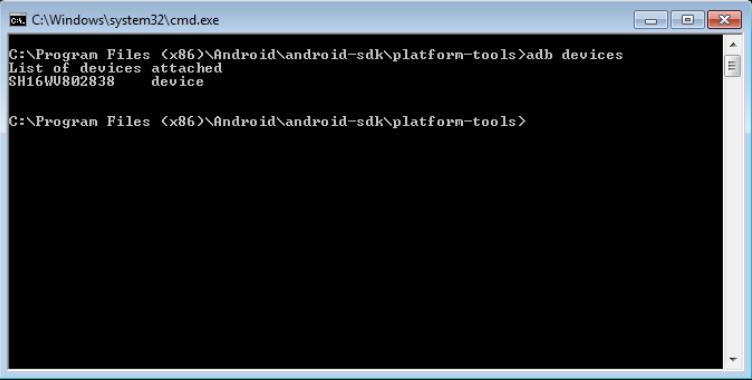
You will witness a list of devices.
Step 4: To mount the directories type in “abd shell” and execute two commands like “mount data” and “mount system”.
Step 5: Now pull the USB config file from the phone to the PC by typing the command:
- adb pull /data/property/persist.sys.usb.config
- C:\Users\[your-username]\Desktop\
Step 6: Connect with persist.sys.usb.config files and open the text editor and edit it to mtp,adb.
Step 7: Type in the following command and then run this command to push the file back to your phone from your PC.
- adb push “C:\Users\[your-username]\Desktop/persist.sys.usb.config” /data/property
Step 8: Use the command “adb pull /system/build.prop C:\Users\[your-username]\Desktop\” to download the build.prop file to your PC.
Step 9: Open the build. prop file on a Text editor and enter the following commands:
- persist.service.adb.enable=1
- persist. service.debuggable=1
- persist.sys.usb.config=mtp,adb
Step 10: Then, save it and push the file to the phone by entering:
- adb push “C:\Users\[your-username]\Desktop/build.prop” /system/
Step 11: Reboot the phone by typing “adb reboot”. The phone reboots in the USB debugging mode.
You have successfully switched your phone to USB debugging mode on the black screen without the touch access feature.
Part 5: How to Enable USB Debugging When Phone Is Locked?
Are you looking for a way to enable USB debugging when you’re locked out of your Android device? I am here to provide you with a working program that can help you enable USB debugging when phone is locked – whether you forgot password, PIN, Pattern lock or stuck on Google account verification after a reset. You can use the program to bypass screen lock and enable USB debugging later, or you can enable USB debugging during the FRP bypass process.
- It can bypass screen lock on 6000+ phone models, including Samsung, Huawei, Google, LG, Motorola, etc.
- It can remove password, PIN, pattern, fingerprint, face lock, app lock from your Android phone and tablet.
- For early Samsung models, you can unlock the device without losing data.
- It can bypass Google FRP lock on Samsung, Xiaomi/Redmi, vivo and OPPO devices.
- It’s compatible with Windows and Mac computer.
Here are the steps to enable USB debugging during the Samsung FRP bypass process:
- Step 1 Go to the official website of the FonesGo Android Unlocker app and download the tool based on your system OS version. Next, launch the app and connect your phone to the PC with the USB cable. Select the Bypass Samsung FRP option on the home screen of the tool.
- Step 2 Next, press Start on the following screen, and choose the correct version of your Android phone. Tap the first option in the list and click the Next button.
- Step 3 Go back to the Welcome screen on your Samsung device. Tap on Emergency call and enter the secret code to access the Diagnostics menu.
- Step 4 Press Next to proceed with the debugging mode. Now, click Authorize button to enable USB debugging mode.
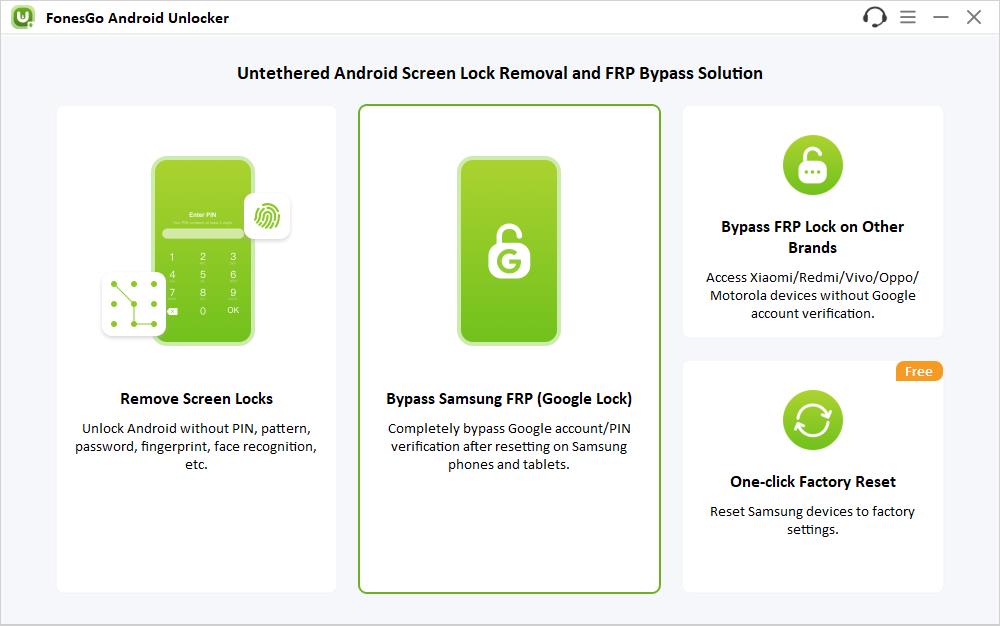
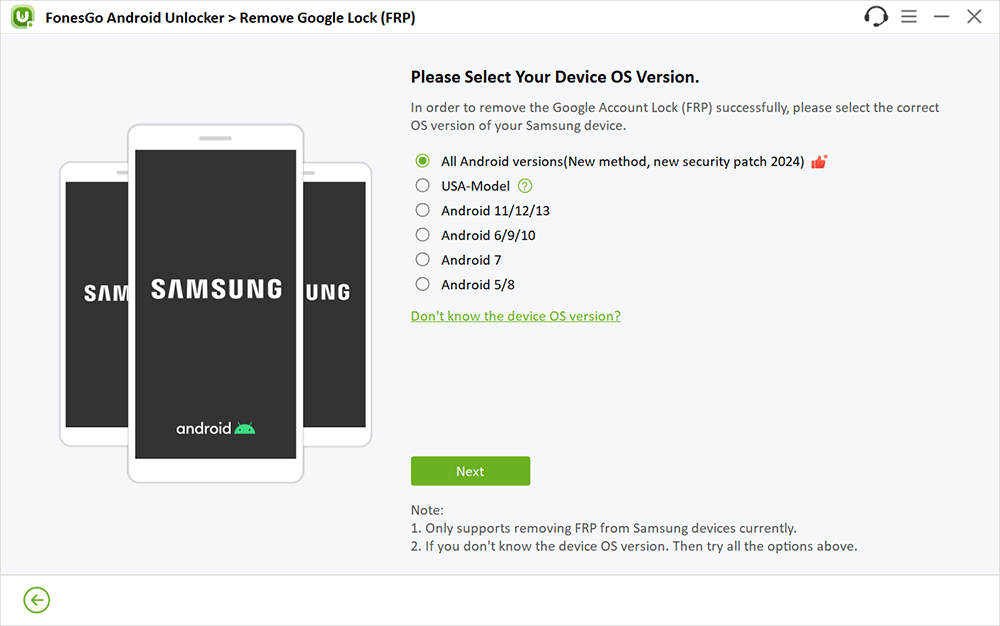
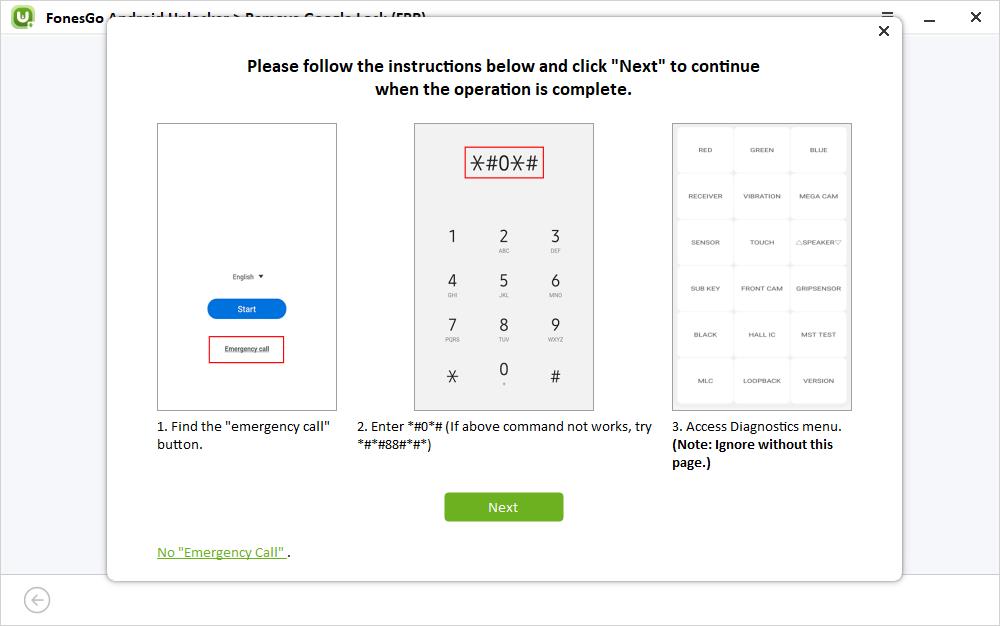
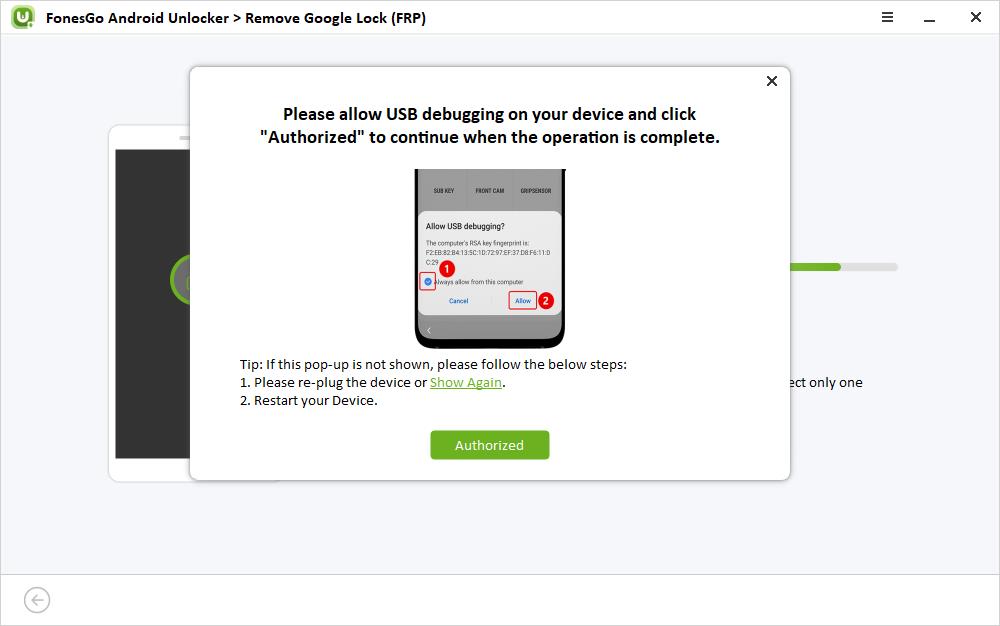
Soon after the authorization process, the tool bypasses the Google FRP lock, and you must hit the Done button on your PC screen to complete this process.
Bonus Tip: How to Turn Off USB Debugging?
You must learn how to turn off USB debugging on your phone after completing your task. It is not recommended to keep the USB debug mode constantly switched on because it risks the safety measures in your phone. Take a quick look at the steps to switch off the USB debug mode on your phone.
Step 1: Unlock your phone and press Settings -> System -> Developer Options -> USB debugging. Now, turn off the toggle switch.
Step 2: You must wait a few minutes to save the changes on your phone.
Follow the above simple steps to turn off USB debugging in no time. Instead of navigating with the menu, you can directly type USB debugging on the Search field in your device and switch off the option quickly.
Conclusion
Therefore, you had a better understanding of the different techniques to enable USB debugging under different phone conditions. Use FonesGo Android Unlocker to bypass FRP locks and push the phone to USB debug mode effortlessly. Surf the above content and choose the appropriate method to activate the debug operation on your device. Stay connected to discover more facts on the USB debug methods.

