Here is a step-by-step tutorial to help you change your GPS location and simulate GPS movement using FonesGo Location Changer. Before starting, download and install FonesGo Location Changer on your Windows/Mac. Then double-click and follow the installation wizard to install the program, and then open the program.
1. Get Started to Use FonesGo Location Changer
Before starting use, the user needs to connect the device to the computer via a data cable/using a WiFi wireless connection. Please follow the steps below to properly connect your device to your computer.
- 1.1 Download and Install FonesGo Location Changer
- 1.2 Connect iOS Devices
- 1.3 Connect Android Devices
1.1 Download and Install FonesGo Location Changer
The first step is to download and install FonesGo Location Changer on Windows or Mac. Then click “Start” to select your device.
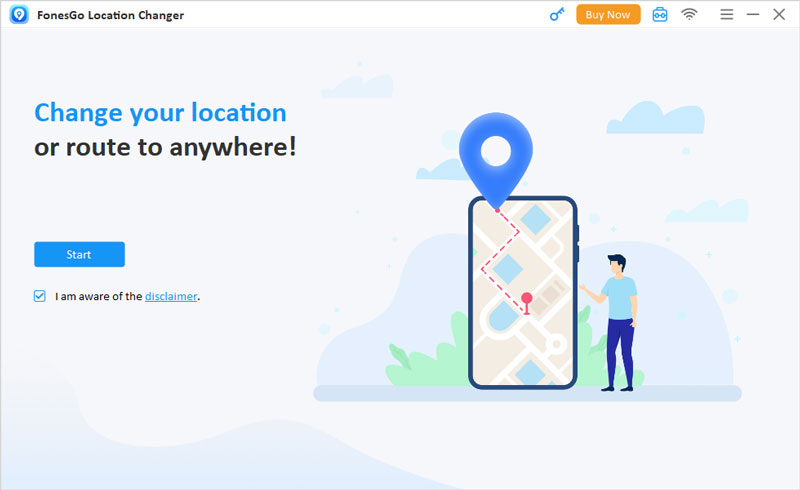
Next, you’ll enter the map, and your current location will appear.

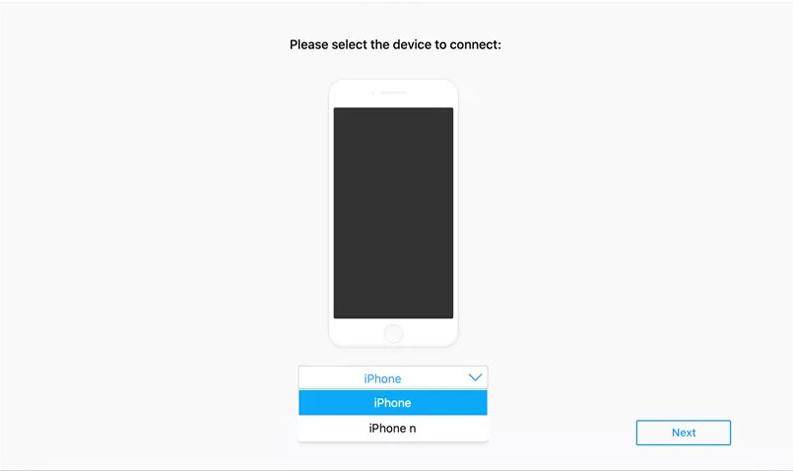
Then, select your device operating system and then, follow the steps to connect your device.
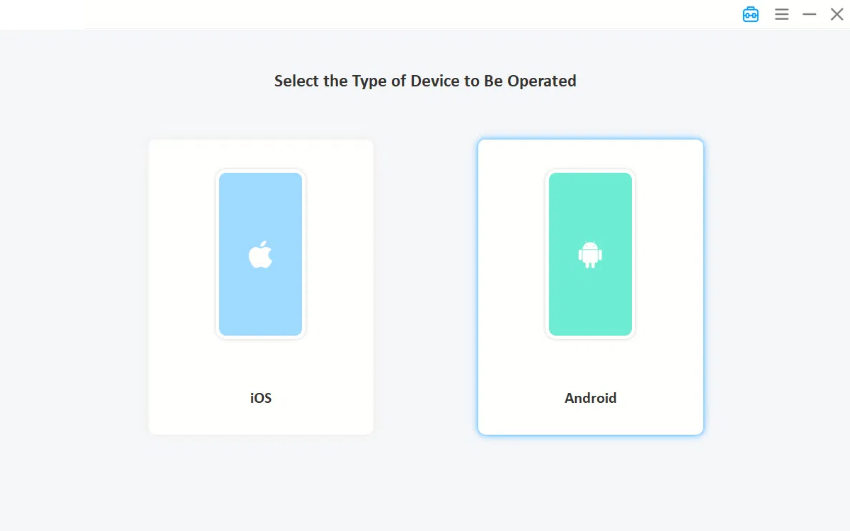
Note that if you are connecting for the first time, you will need to enable developer mode on iPhone or enable USB debugging on Android.
1.2 Connect iOS Devices
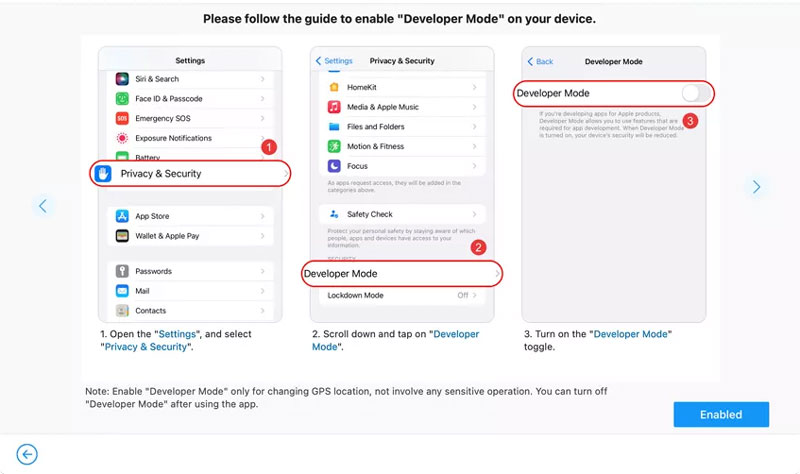
Enable the “Developer Mode” on iOS 16 or Later:
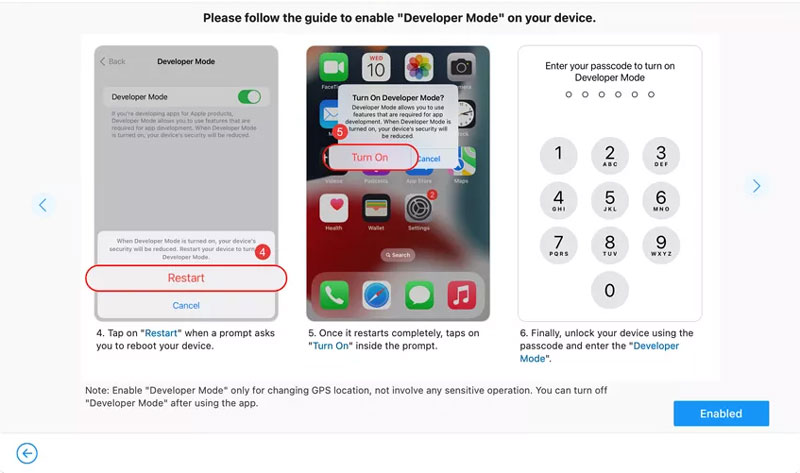
You can click “Toolbox” in the upper right corner of the main page > choose to turn on developer mode. Or follow the product’s guide to set it up. After connecting the device to FonesGo Location Changer, a guide will appear on the interface to teach you how to turn on developer mode correctly. Please follow the steps before changing the location.

You need to restart the device after turning on the “Developer Mode” switch. After a complete restart, click Open and unlock using the passcode on your device.
1.3 Connect Android Devices
FonesGo Location Changer now supports the latest Android 14, please follow the steps below to connect your Android device before getting started.
Enable USB debugging on Android device
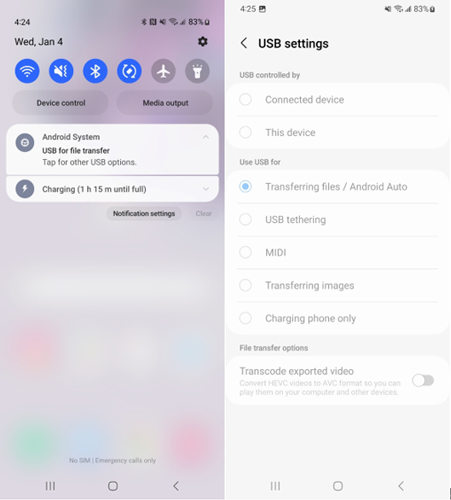
Connect your Android device to PC via USB, scroll down the notification shade and tap on the Transfer Files option in USB connection mode.
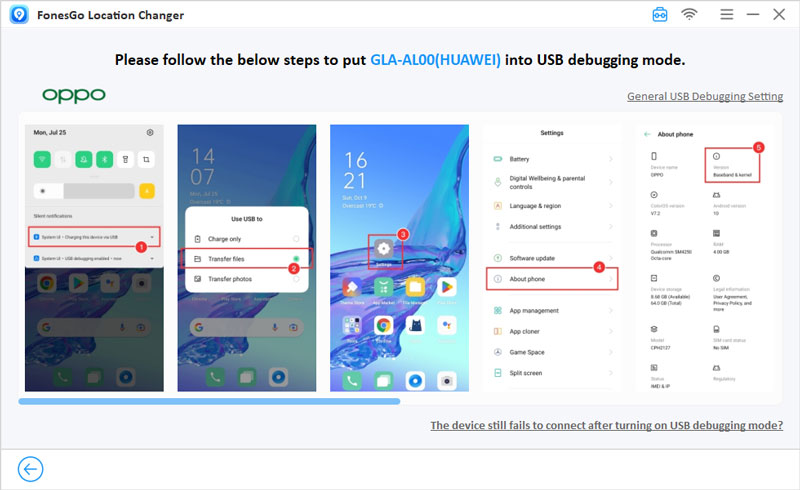
Then go to “Settings” > “Search Build Number” > Tap “Build Number” 7 times to enable Developer Mode > Enable USB debugging under Developer options.
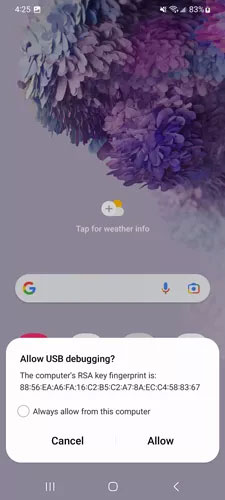
Confirm USB Debugging
Once here, your Android device will pop up a window asking you to allow USB debugging and you need to click “Allow” to continue.
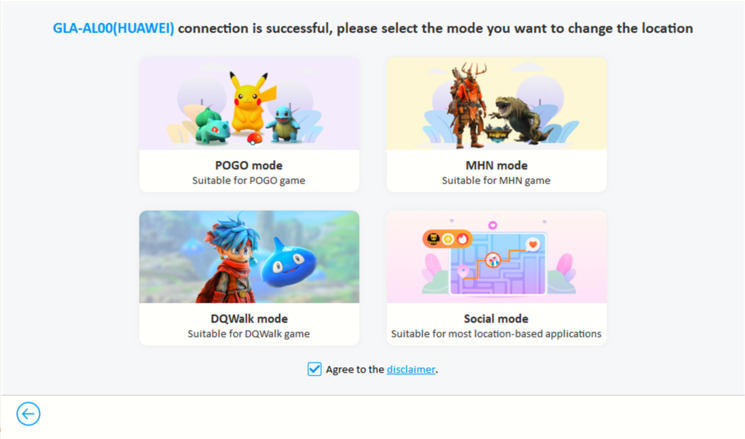
Now you are ready to use the features of FonesGo Location Changer. Check out the how-to video to learn how to easily change the GPS location of your iPhone, iPad or iPod touch using FonesGo Location Changer.

- Change GPS location on iPhone/iPad in clicks (No Jailbreak).
- Fake Pokemon Go GPS on Android and iOS devices.
- Simulate GPS movement along any custom path with joystick.
- Collect and import popular GPX route files for next use.
- Works well with location-based social apps and AR games.
- Fully support the latest iOS 26/Android 15.
2. Teleport to Any Location
You can teleport anywhere in the world you want in seconds.
- Step 1 Once connected, your current location will be displayed on the map on the next page. If the position is not accurate, you can click the Center icon to get the correct position.

- Step 2 Click the “Teleport” icon in the upper right corner of the screen and enter the location you want to teleport to, and finally click “Search”.

- Step 3 Click “Start” to teleport, and your location will be changed to the specified location within a few seconds.

3. Simulate Movement along A Specified Route
At the same time, you can also use AnyGo to simulate GPS movement between two predetermined locations:
-
Step 1
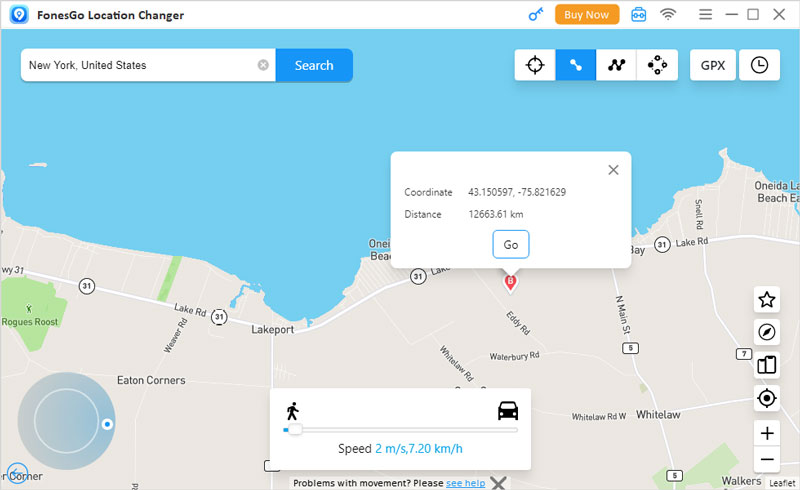
Click on the “Two-spot Route” icon in the upper right corner. Select or enter where you want to go on the map. A pop-up will appear on the page telling you how far away it is.
You can drag the slider at the bottom to set the speed you want, and you can select Realistic Mode to look more realistic at different speeds. Additionally, FonesGo Location Changer offers options for walking, biking or driving speeds. Click “Go”.
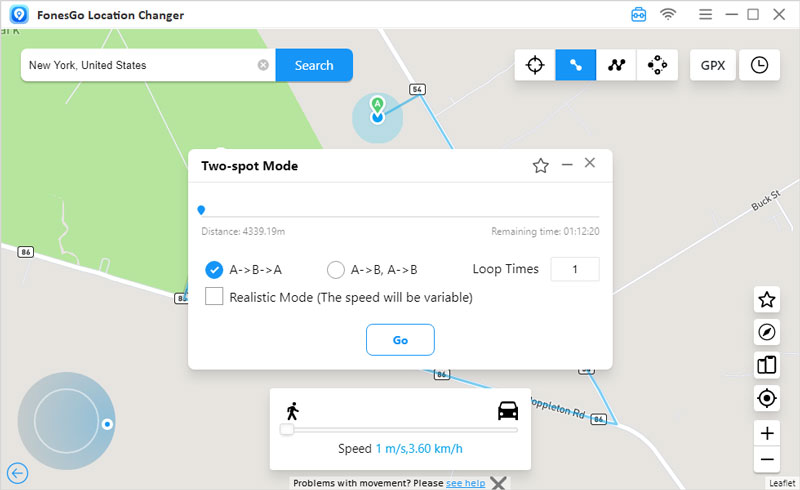
- Step 2 In the pop-up box that appears, select the number of times you want to move between the two locations and click “Go.”
4. Simulate Movement along A Route (set by multiple spots)
If you want to go to many places on the map, you can choose a multi-stop route.
- Step 1 Select the multi-stop route icon in the upper right corner of the screen. Then click on all the places you want to pass. A pop-up window will appear showing the distance you will travel. Select the desired movement speed and click Go.
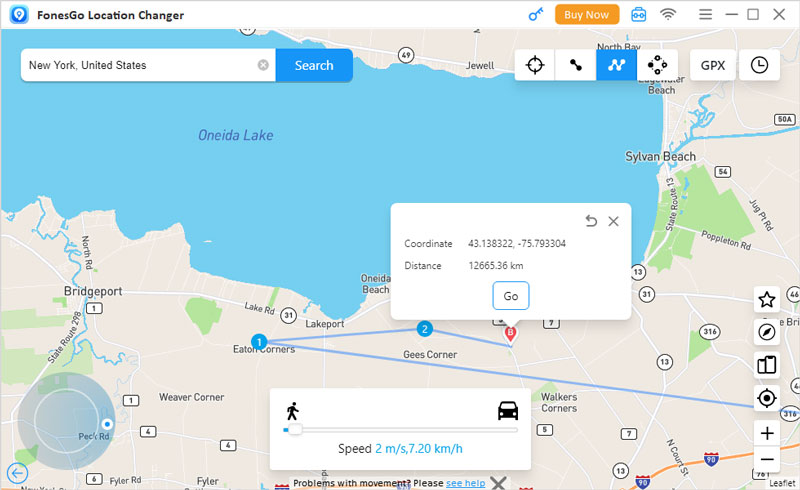
NOTE: Make sure the position you set follows a specific route to avoid the movement appearing unnatural.
- Step 2 Specify how many times you want to move along the selected path and location and click “Go”.
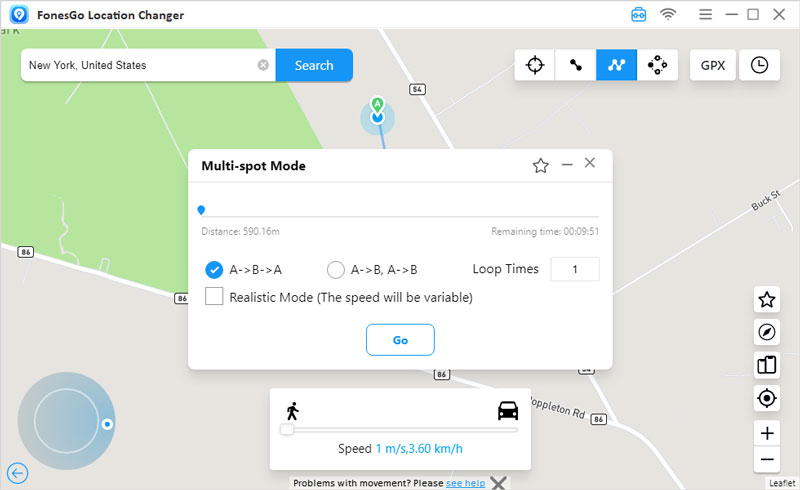
The GPS on your device will move along the path at the specified speed. If you want a realistic experience, you can select “Real Mode” for natural speed.
5. Jump Directly to Any Custom Destination
Jump teleport mode helps you jump directly from one location to a designated new location.
5.1 Jump Manually
- Step 1 Open FonesGo Location Changer and connect your device, the map will show your current location. Click on the second button “Jump Teleport Mode”.
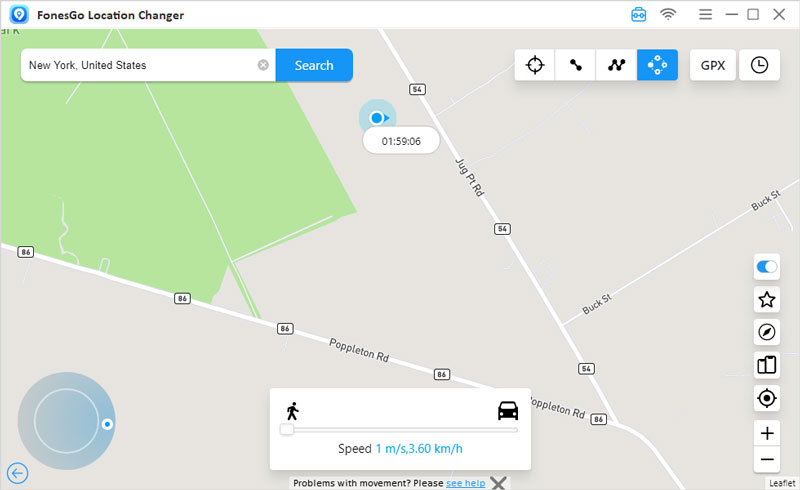
- Step 2 Choose where you want to jump and create a custom route. Then click the “Go” button.
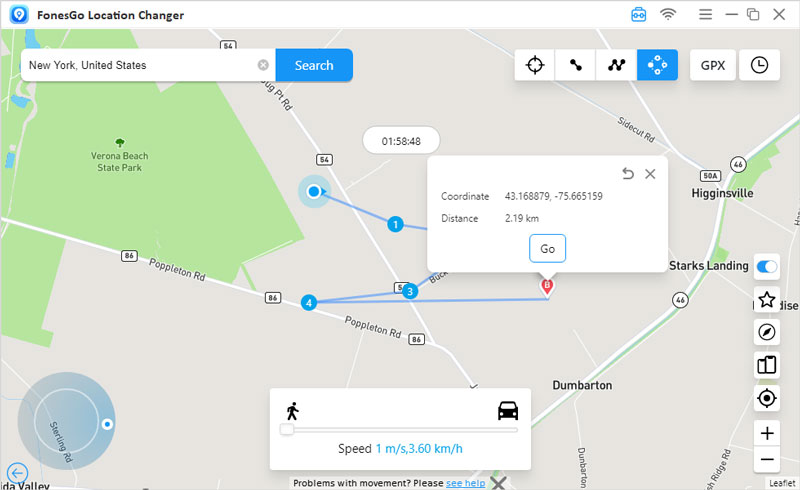
- Step 3 Click the “Next” button to continue jumping and jump directly to the next new location.
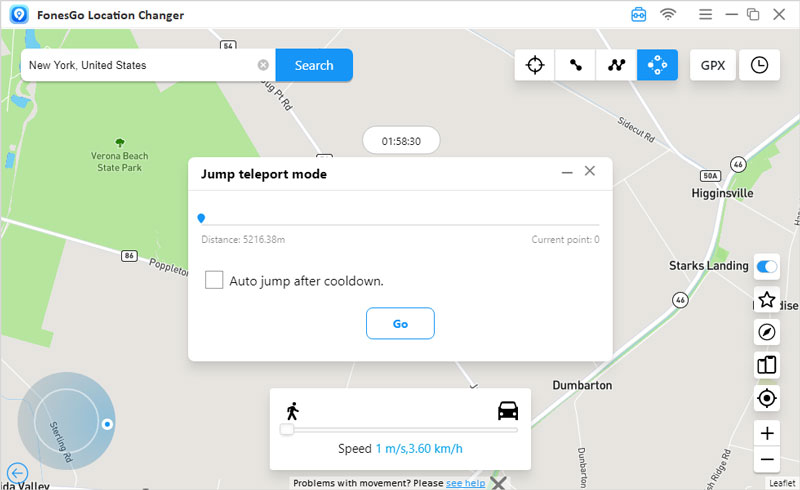
- Step 4 When all points are completed, click “Done”.
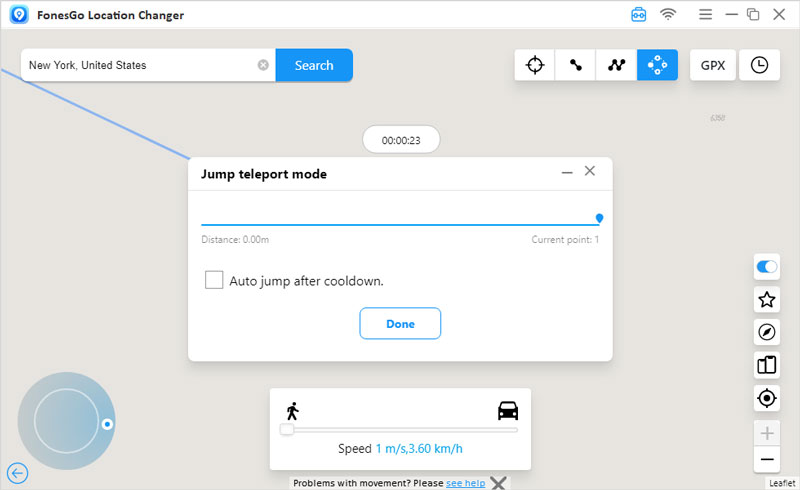
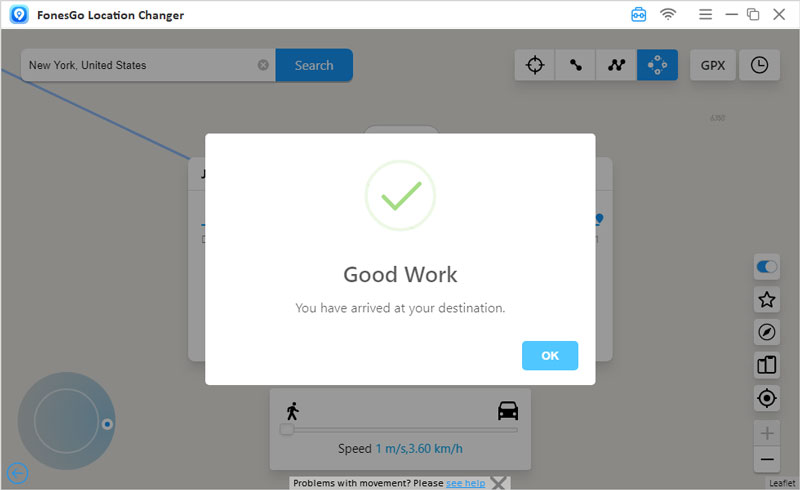
- Step 5 Finally click “OK”. Now you have reached your new destination!
5.2 Jump Automatically
If you are still a loyal user of the Pokemon Go game, it is highly recommended that you select “Auto jump after cooldown”.
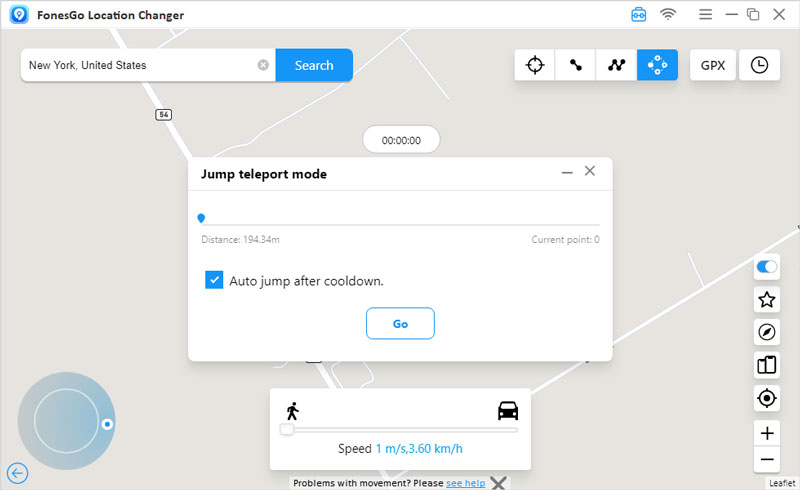
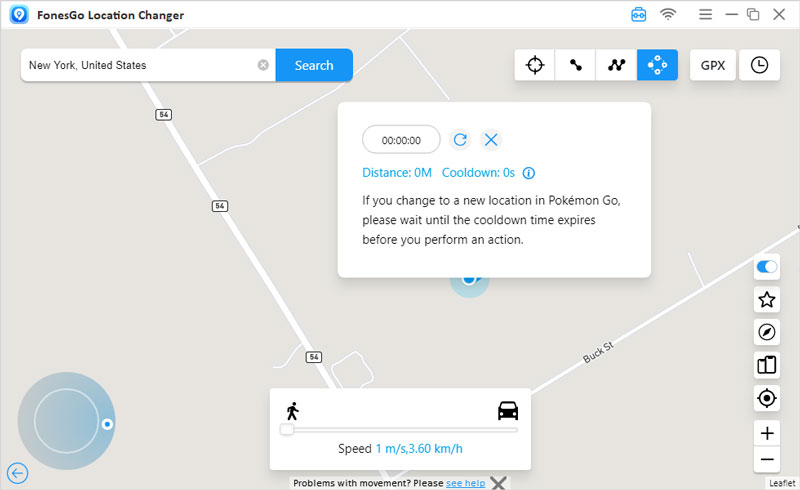
You can avoid getting banned from the game by strictly following the Pokemon Go cooldown chart while playing Pokemon Go. At the same time, “Auto jump after cooling down” can automatically set the time according to the distance, which is very helpful to you.
6. Use Joystick for GPS Control
The joystick feature in the lower left corner of the FonesGo Location Changer screen can save you a lot of time and energy when controlling your GPS.
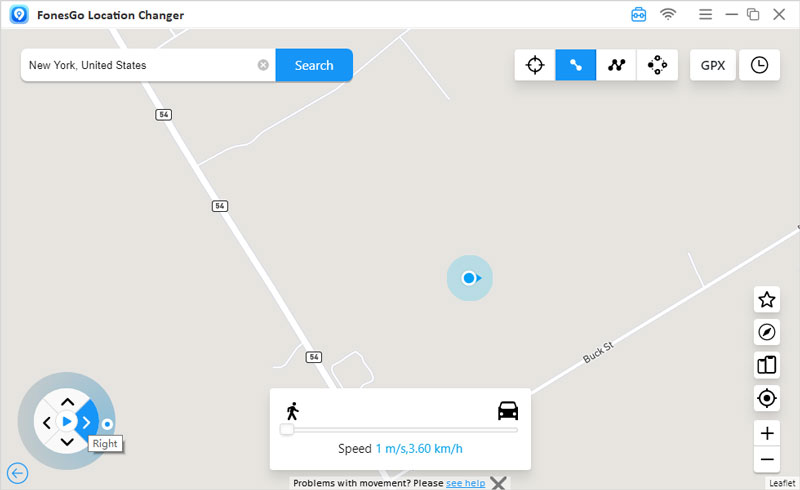
Whether in one-stop or multi-stop mode, the joystick is designed to help you move your GPS from one point to another easily. And it also allows you to change direction in real time.
Here are some situations where joysticks are useful:
Automatic GPS Movement: Click the “Start” button to initiate automatic movement. You can then change the orientation if needed using:
- ◾Click the left or right arrow
- ◾Drag the point around the circle
- ◾Press the A and D keys on your keyboard
- ◾Press the left and right keys on the keyboard
Manual GPS Movement: You can move forward using the “up” arrow in the program or long pressing W or the up key on your keyboard. To reverse direction use the “down” arrow in the program or the “S” or “down” arrow on your keyboard.
You can also use the above 4 methods to easily change direction and perform GPS control before moving forward or backward.
7. Import GPX Routes File to Autowalk
The GPX import function is used to exchange GPX location data with others. By importing GPX users can quickly and easily use featured routes.
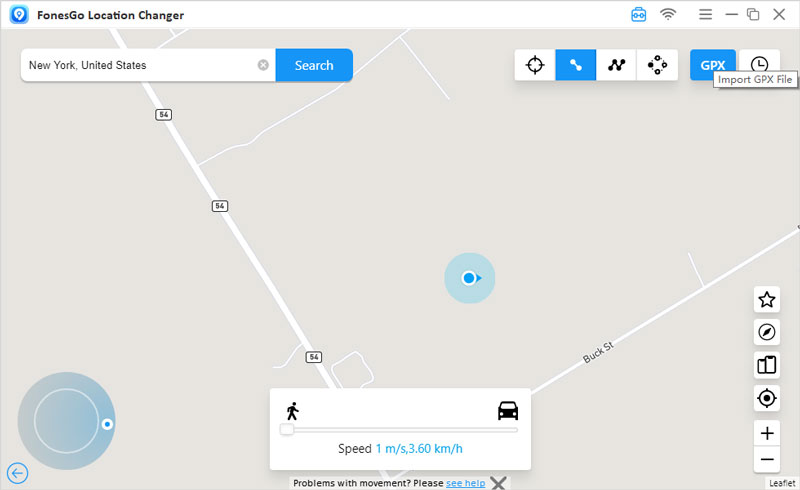
- Step 1 Click the GPX icon in the upper right corner.
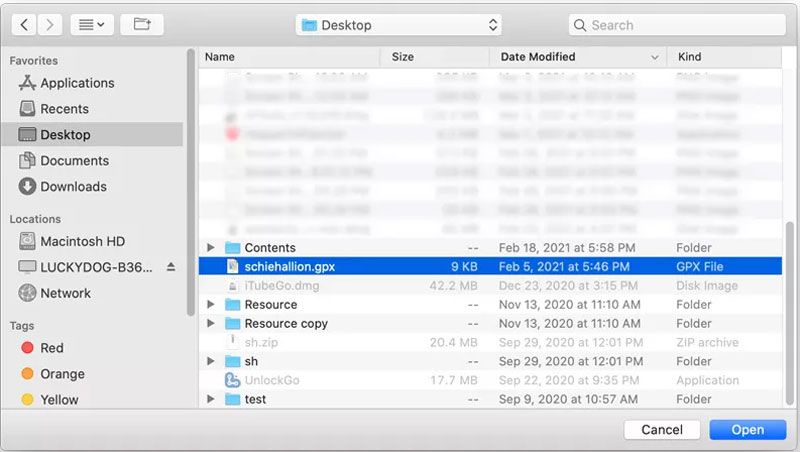
- Step 2 Select the GPX file you want to use and import it into FonesGo Location Changer.
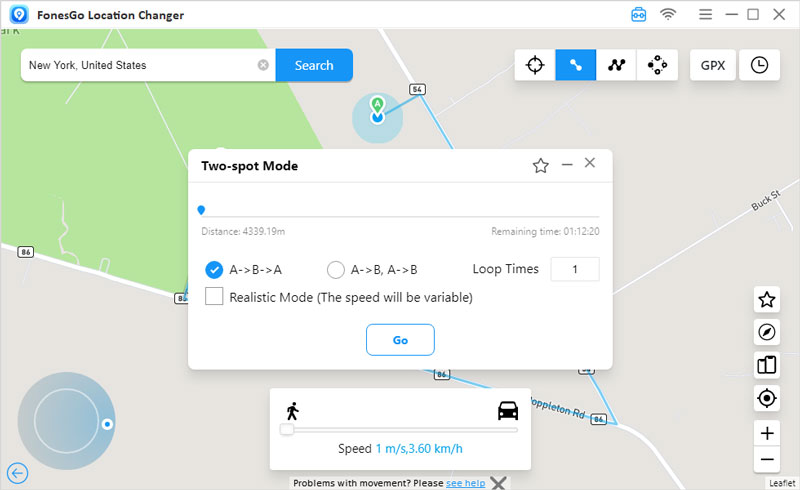
- Step 3 After importing select the number of times you want to repeat the route, next, click the “Go” button to start following the route in the GPX file on FonesGo Location Changer easily.
8. Spoof GPS of Multiple Devices Simultaneously
FonesGo Location Changer can manage and spoof multiple devices at the same time, allowing you to change the location of all iOS or Android devices with just one click.
- Step 1 Click the “Manage Multiple Devices” icon in the lower right corner.
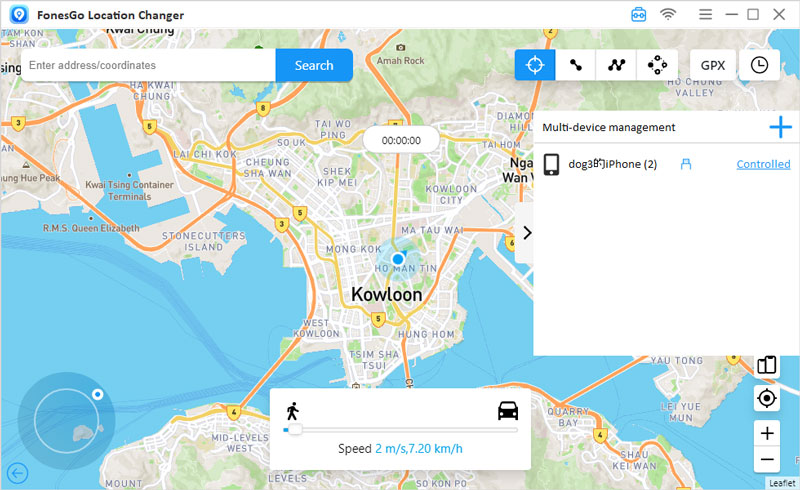
- Step 2 Then you will see a small window as shown below. Please click the “Add” button to add a new device, then connect the device to the computer and wait for it to be recognized.
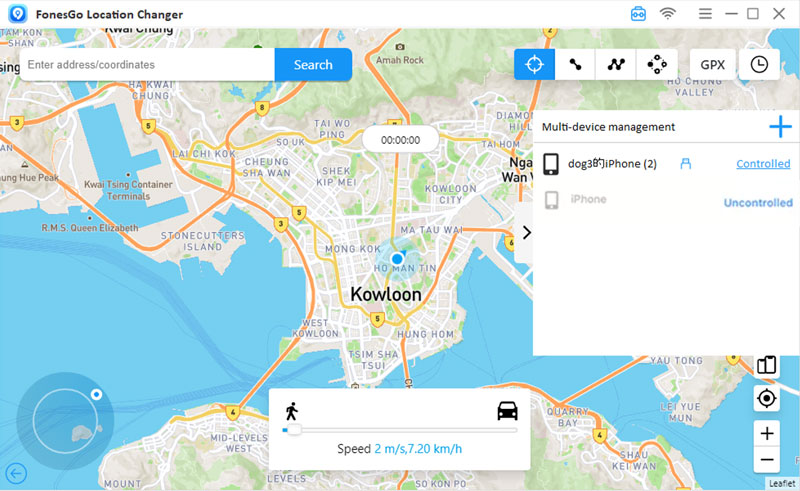
- Step 3 The interface will display the status of all connected devices as “Controlled” or “Uncontrolled”. The controlled state means that the device is now using the virtual location, while the uncontrolled state means the opposite.
If you need to switch the status from “Controlled” to “Uncontrolled”, just click the corresponding button.
- Step 4 Select the device you want to operate on and select a mode to easily spoof the location.

9. Special Features of FonesGo Location Changer
- 9.1 Preferred location and route
- 9.2 Historical records
- 9.3 Automatic closing the path
- 9.4 Returns or Loops
- 9.5 Wi-Fi wireless connection
- 9.6 Added Cooldown Timer
9.1 Preferred location and route
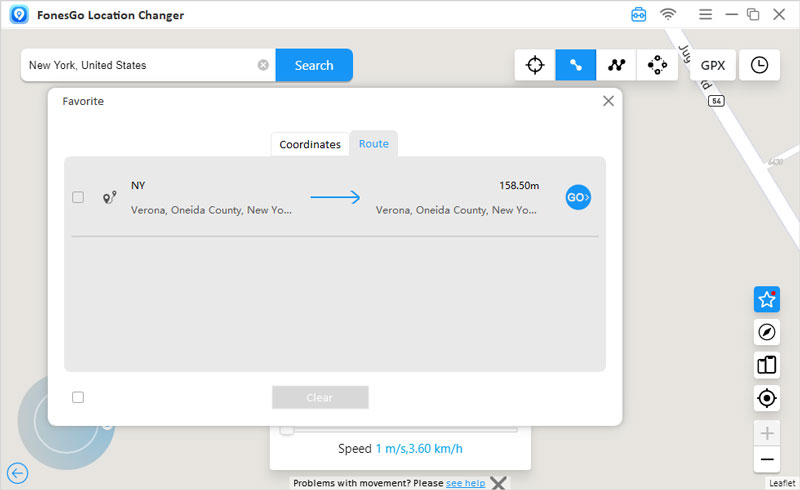
When setting a location, click the “star” icon in the upper right corner of the popup to bookmark the location for future use.
If you created a route, click “Go” and then tap the “Star” icon in the pop-up window to save the route. At the same time, the program will prompt you to name the route so that you can easily find it next time.


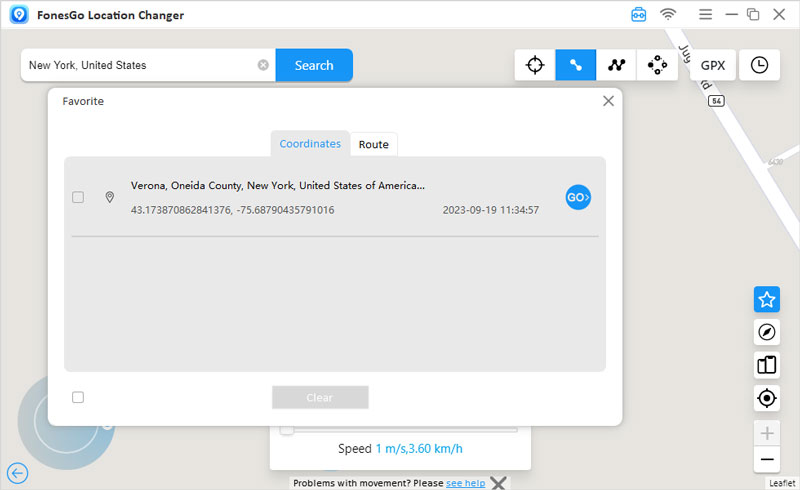
All your favorite places and routes will be saved in Favorites. Click the star icon on the right side of the main interface to display the favorites box.
9.2 Historical records
“Historical Records” saves the location and routes you take each time you use it. The next time you use it, click on the right side of the main interface to find “History”, and then you can reach the previous location or start walking with one click. Of course, you can also add it to your collection.
9.3 Automatic closing the path
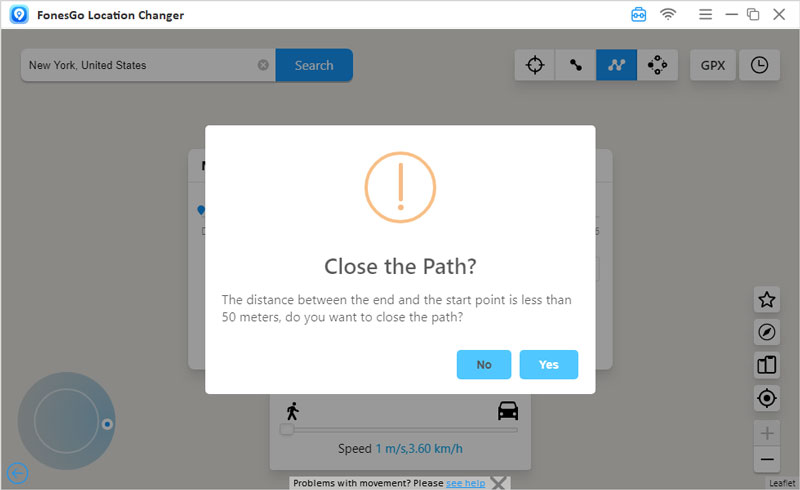
In multi-point mode, when the start and end points are less than 50 meters, the program will automatically pop up a window asking you if you want to close the path. Click Yes to close the route and overlap the start and end points to form a loop. Click “No” to leave the end point unchanged.
9.4 Returns or Loops
In order to make the simulated walking more natural, you can set the route to loop (A->B, A->B) or return to the original route (A->B->A) and the number of repetitions of the route.

9.5 Wi-Fi wireless connection
FonesGo Location Changer supports wireless connections, which means you can connect the device to your computer via Wi-Fi. Ditch the USB cables and easily connect multiple phones. See detailed guidance here.

How to connect:
- ◾Turn on Wi-Fi on your device and connect to a wireless network.
- ◾Make sure your computer is connected to the same Wi-Fi network.
- ◾Launch FonesGo Location Changer and click Start. After a few seconds, the program will automatically detect all devices connected to Wi-Fi.
- ◾Select the iOS device you want to connect to.
9.6 Added Cooldown Timer
In order to avoid being caught cheating while playing Pokémon Go and causing your account to be banned, FonesGo recommend that you refer to the Pokémon Go cooldown table, use the cooldown timer and wait for the predefined cooldown time before proceeding to the next step.

10. Bluetooth Gaming Joystick (Windows)🔥
The new Bluetooth Gaming Joystick lets you spoof GPS in Pokémon Go without Error 12 or cracked apps. It’s risk-free and ban-proof! Follow these 4 easy steps to use it:
✅ Learn More: FonesGo Location Changer Bluetooth Not Working? Quick Fixes
- Step 1 Turn on Pro Mode:
- Step 2 Connect PC to iPhone via Bluetooth:
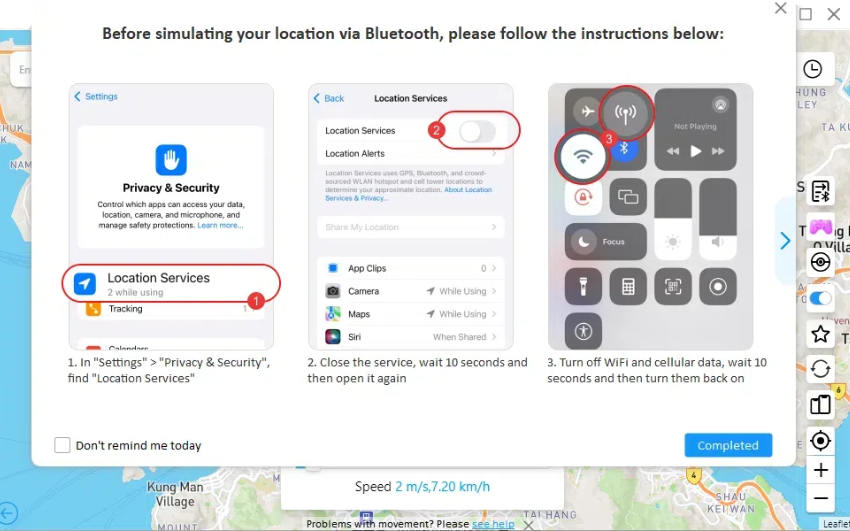
- Step 3 Restart Location Services:
- ◾ Location Services
- ◾ Wi-Fi
- ◾ Cellular
▶ Open the app on your Windows PC.
▶ Select Pro Mode to start location spoofing for your game.

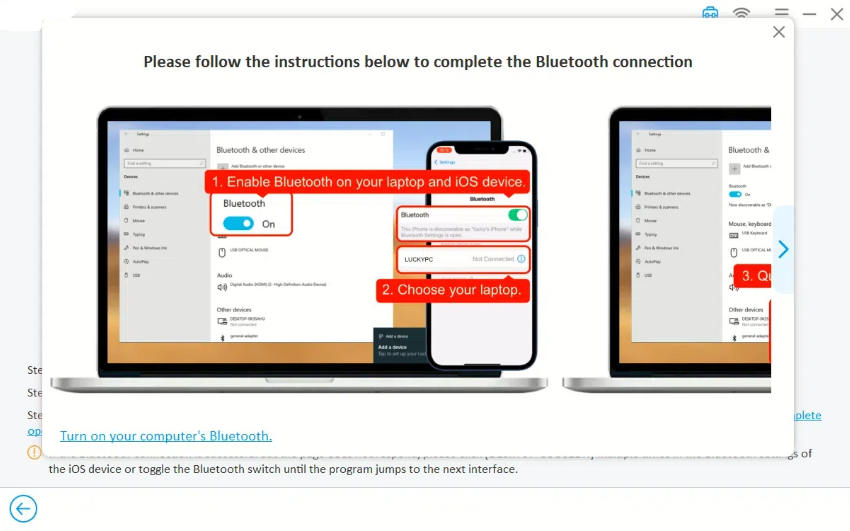
▶ Follow the on-screen steps to connect your PC’s Bluetooth to your iPhone.
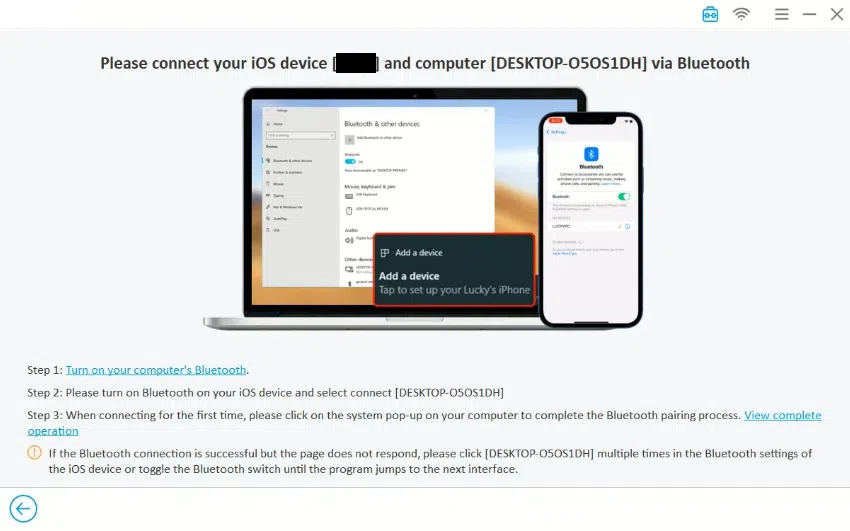
▶ Need help? Click “View complete operation” for a detailed guide.
▶ After connecting, wait 10 seconds.
▶ Re-enable these settings on your iPhone for smooth performance:
11. Best Auto Pokemon Go Scanner for PokéStops & Gyms 🔥
Want an easier way to find Pokémon, raids, and battle teams without wandering aimlessly? The latest update in FonesGo Location Changer brings a powerful auto-scan feature that does all the hard work for you! With just a tap, you can scan your area for nearby Pokémon, join active raid groups, and locate valuable resources—all without breaking a sweat.
Here’s how to use this feature step-by-step:
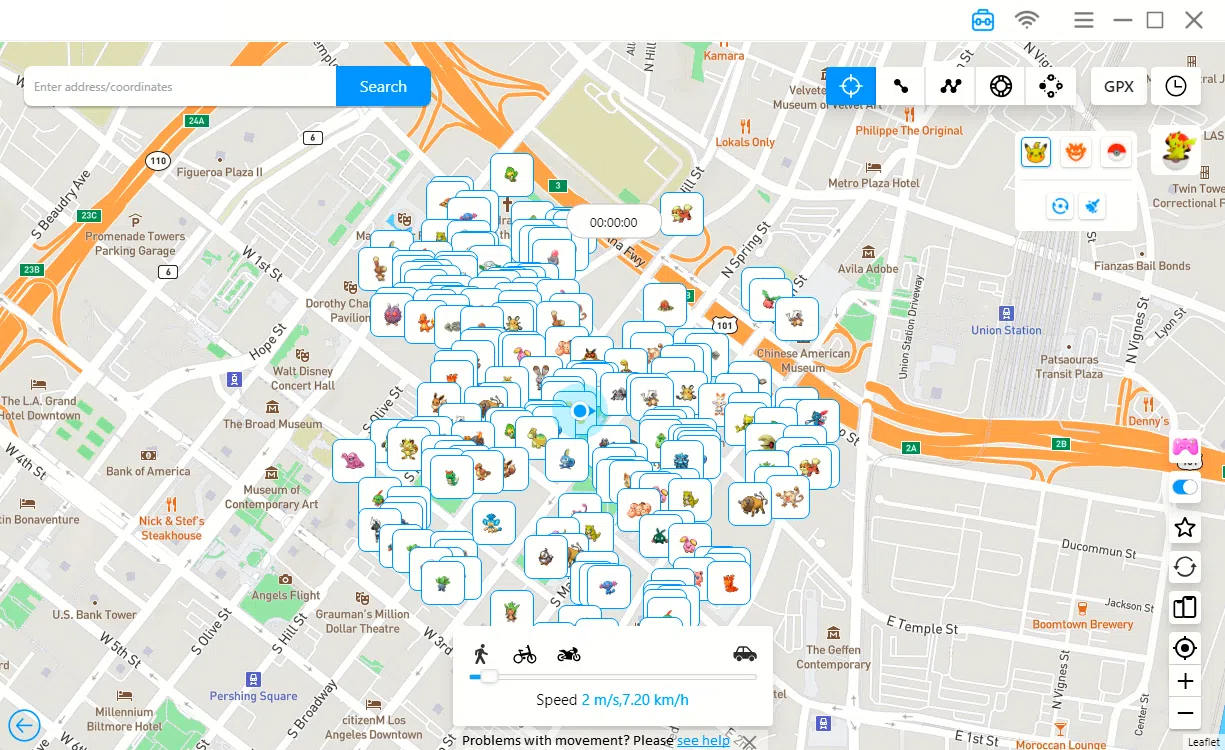
- Step 1 Tap the Pikachu icon in the top-right corner of the screen. A quick access bar will appear with three key options:
- Step 2 Select the first icon to scan for nearby Pokémon. Hit “Go” to instantly teleport to their exact locations. You can even adjust movement speed and style to mimic real gameplay.
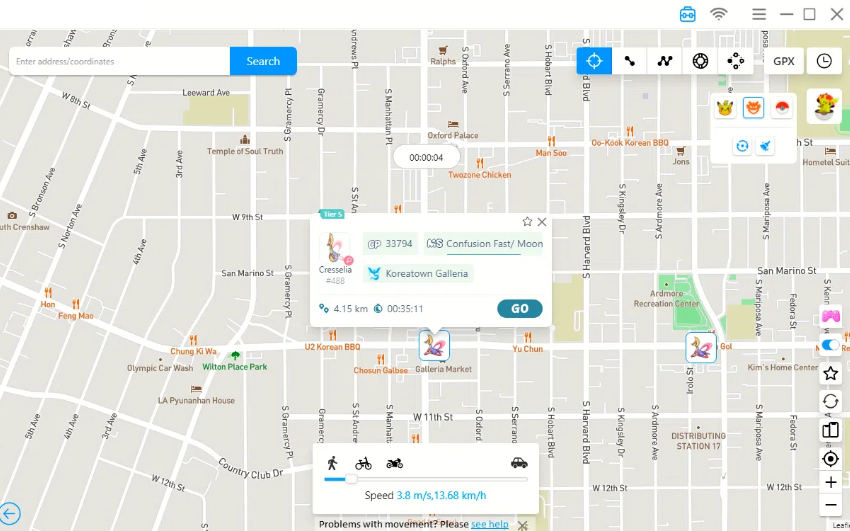
- Step 3 Tap the second icon to find nearby raid or battle teams. Again, click “Go” to jump straight into action and join ongoing battles.
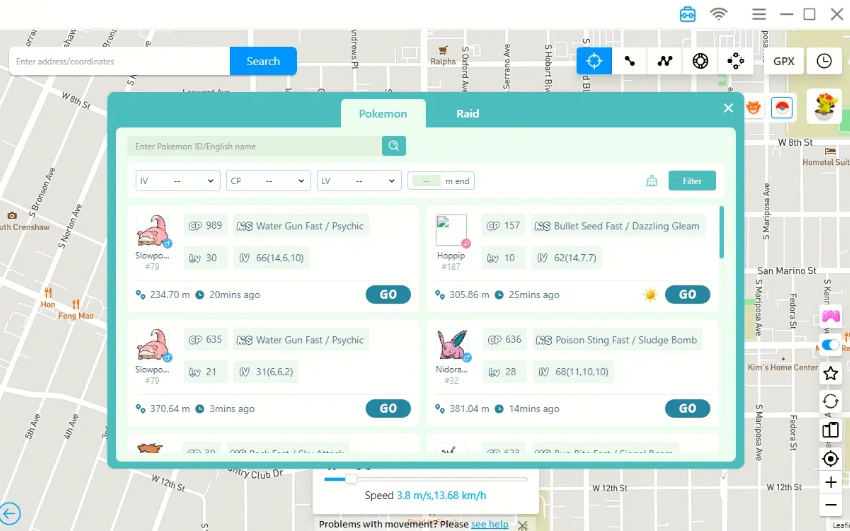
- Step 4 Use the third icon to explore a list of Pokémon resources—filter by name, raid type, or rarity to find the exact Pokémon you want.
▶ Nearby Pokémon Scan
▶ Nearby Battle Teams
▶ Pokémon Resource Search

12. Latest! Best Pokémon Go Auto Catcher for iOS & Android 🔥
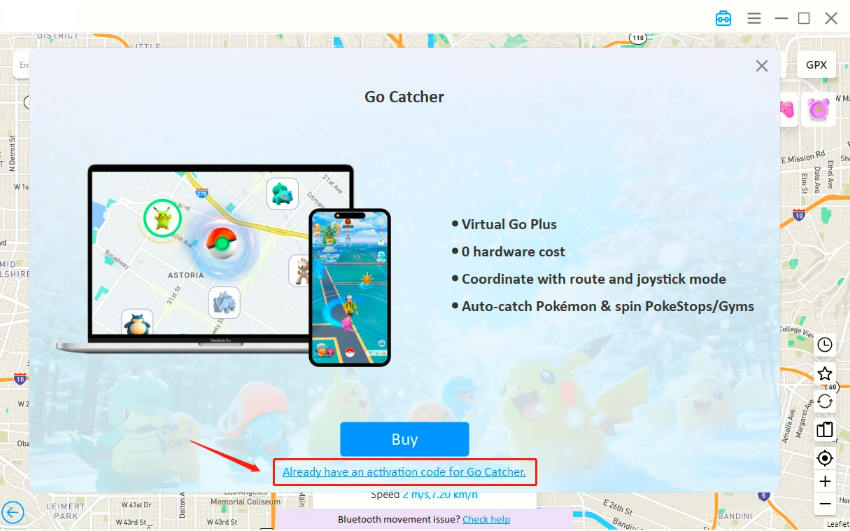
Want to catch Pokémon and spin PokéStops automatically? With FonesGo Location Changer and Go Catcher, you can play Pokémon Go without the hassle of tapping your screen all the time!
Here’s how to use it:
- Step 1 Enter your activation code for Go Catcher, or buy one if you haven’t yet.
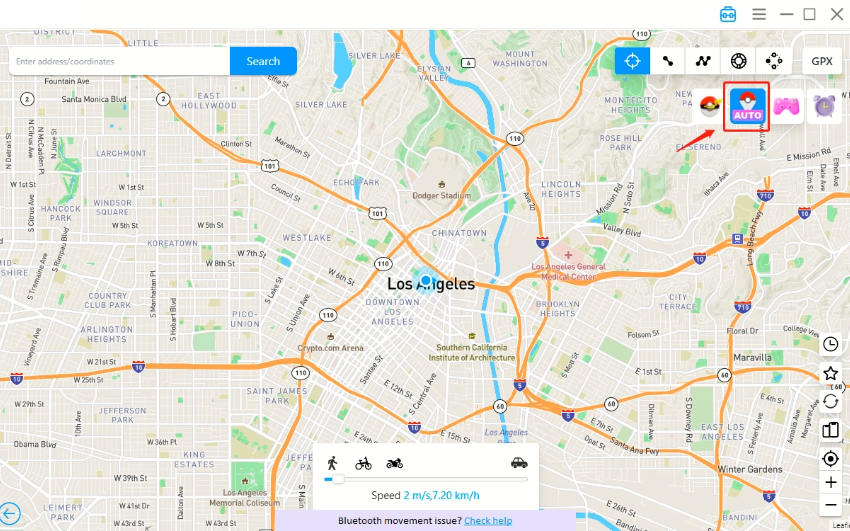
- Step 2 Tap the “Auto” icon at the top to open the Go Catcher feature.
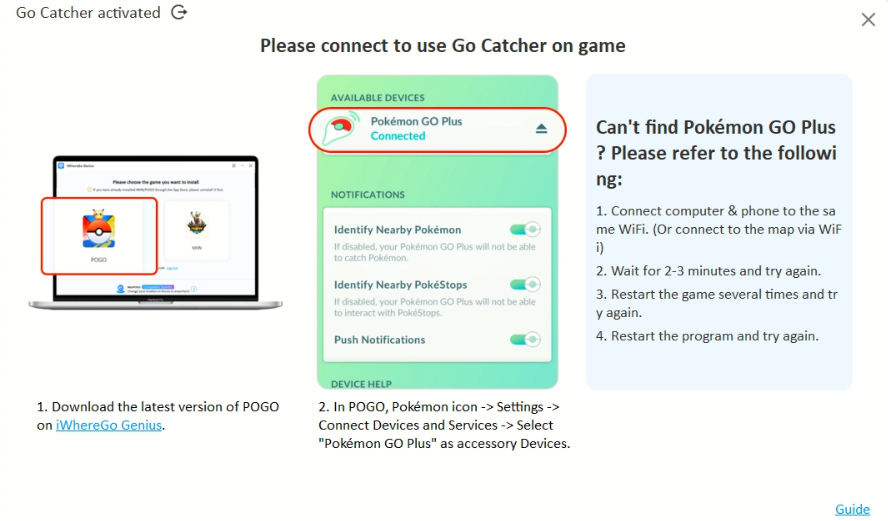
- Step 3 Set up Go Catcher by following the instructions for your phone.
✅ Learn More: How to Use Go Catcher to Get More Rare Pokemons

