Whether you purchased a used Samsung phone or got one from your organization, you may see the warning “This phone is protected by Knox cloud service” when setting it up. Although this security feature benefits any organization by streamlining the initial setup and device enrollment, it is annoying if you want to unlock it for personal use, even after a factory reset, especially when you don’t know how to remove the Knox Enrollment service.
To facilitate you, this article features two efficient Knox Cloud service unlock solutions. But first, let’s look at the Samsung Knox Enrollment service.
Part 1: Why Does Your Samsung Phone Say Protected by Knox Cloud Service?
The message “Your phone is protected by Knox Cloud Service” means that your device is enrolled on Knox enrollment service.
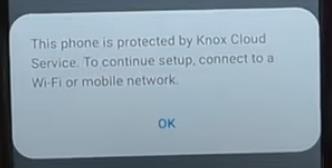
This Samsung Knox Mobile Enrollment service helps businesses to seamlessly and quickly set up and handle the bulk of Samsung phones with low configuration variation without manual intervention, thus ensuring security, compliance, and efficient device management. This is done by the authorized resellers or the IT administrators who configure profiles.
However, in some cases, users inquire if it’s possible to remove the Knox Enrollment service for certain activities, like getting root access, customizing OS, and more. The answer is yes. However, remember that this should not be done without your employer’s consent.
Part 2: How to Fix “This Phone Is Protected by Knox Cloud Service”?
Once you have learned about this security feature by Samsung, it’s time to delve into the leading Knox Cloud service unlock methods. Let’s discuss them one by one with the detailed tutorials:
Method 1. Remove Knox Enrollment Service from the Admin Account
The Knox Enrollment service is beneficial for IT administrators because the users can’t delete the KME app from their Samsung phones to mishandle them. However, this is possible only with the Samsung Knox portal. Here is a step-by-step guide on how to remove the Knox Enrollment service from the admin account:
Step 1. After opening the Samsung Knox portal, sign in using the admin credentials.
Step 2. Now, choose “Samsung Knox Mobile Enrollment” and click “Devices.”
Step 3. It’s time to select your Samsung phone and press the “Actions” button.
Step 4. Tapping the “Clear Profile” button will remove the profiles on your device.
Step 5. However, if you pick the “Delete Device” tab, the Knox Enrollment service is disabled.
Sometimes, you even need to uninstall the Knox app from the Samsung phone by opening “Settings”> “Apps”> “Knox”> “Uninstall” or “Disable.” This option is not available for all devices based on the Knox configuration.
Method 2. Remove Knox Enrollment Service without Password
If you can’t access the admin account password, especially when you purchased an employee’s phone, this method is the only way out. Although this is a little tricky and a long process with the requirement to download a third-party tool, you can try it to access your device without a password. Let’s comply with the given tutorial on how to remove the Knox enrollment service without a password:
Step 1. Once you see the login screen, click the back button two times and choose “Yes.” You will see the enrollment in progress loader. Press the return icon again and tap “Wipe.”
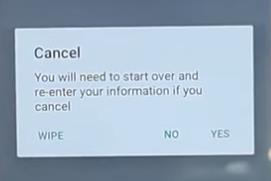
Step 2. After displaying the “Erasing” screen, your Samsung phone will restart. Choose the “English” language and click “OK.”
Step 3. Download and install SamFw Tool on your computer. Then run it.
Step 4. When you connect your Samsung phone to the computer, this program will automatically detect the phone from the drop-down menu. Press the “Disable Knox” button.
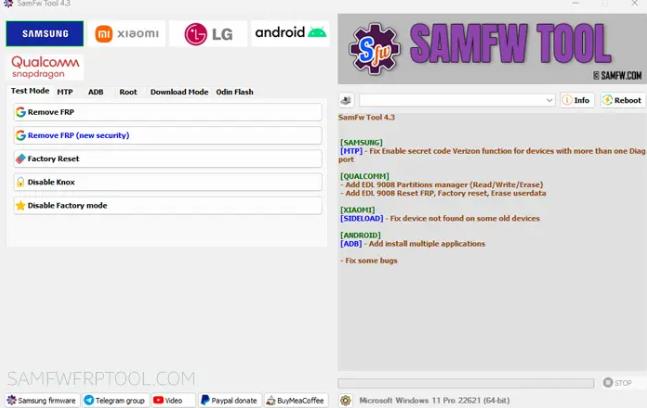
Step 5. Click “Emergency Call” from your phone and type “*#0#*.” When you see the Test Mode screen on your Samsung phone, hit “OK” from the computer. You will see the program working.
Step 6. Choose the “Allow” option for the “Enable Debugging” menu from your phone. The bypass will be removed after the factory reset. Your Samsung phone will restart and can be unlocked without a password. That’s all!
Bonus Tip: What to Do If Your Phone Is Protected by Google Device Protection?
Besides the Knox Mobile Enrollment service, Samsung phones also have a Google Device Protection feature. This feature requires your Google account information to verify your identity, thus safeguarding your phones from unauthorized factory resets.
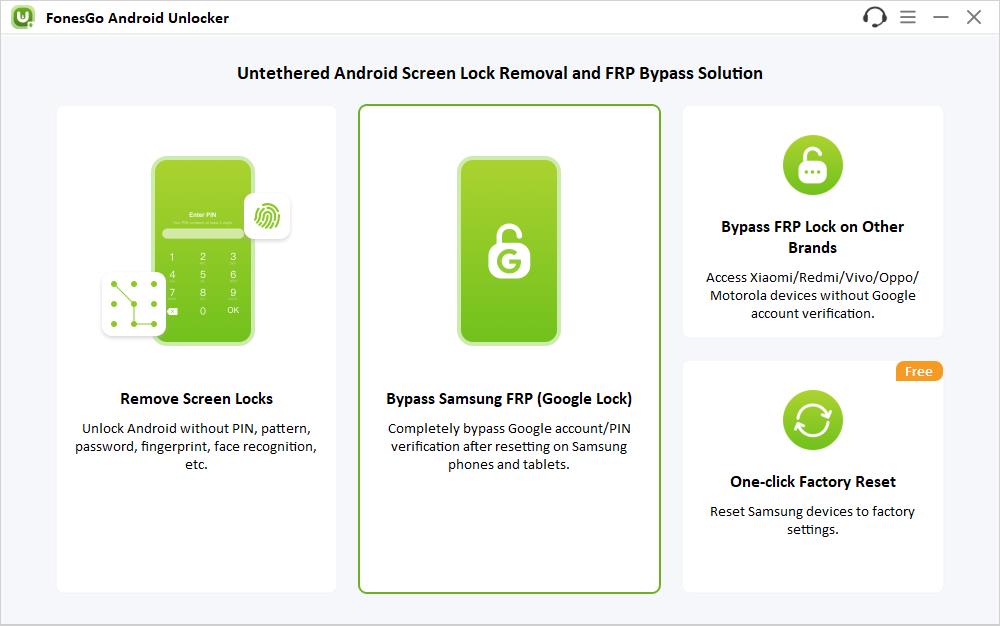
But sometimes, you may forget the account credentials even if you’re the phone’s owner. In this situation, FonesGo Android Unlocker is the ultimate solution. It provides various options to remove Samsung FRP on different versions of a Samsung phone. Let’s look at its main features:
- It can remove Google Device Protection without password on all Samsung phones and tablets.
- It’s easy to use. You can remove Samsung Google FRP in 1 click.
- It can remove password/PIN/pattern lock on early Samsung devices without data loss.
- It can help you reset Samsung devices in 1 click, and it’s free.
Here are the detailed steps on how to bypass Google Device Protection on Samsung using FonesGo Android Unlocker:
- Step 1 Launch this software on your system and choose “Bypass Samsung FRP (Google Lock). Also, connect your Samsung phone to the computer and tap “Continue.”
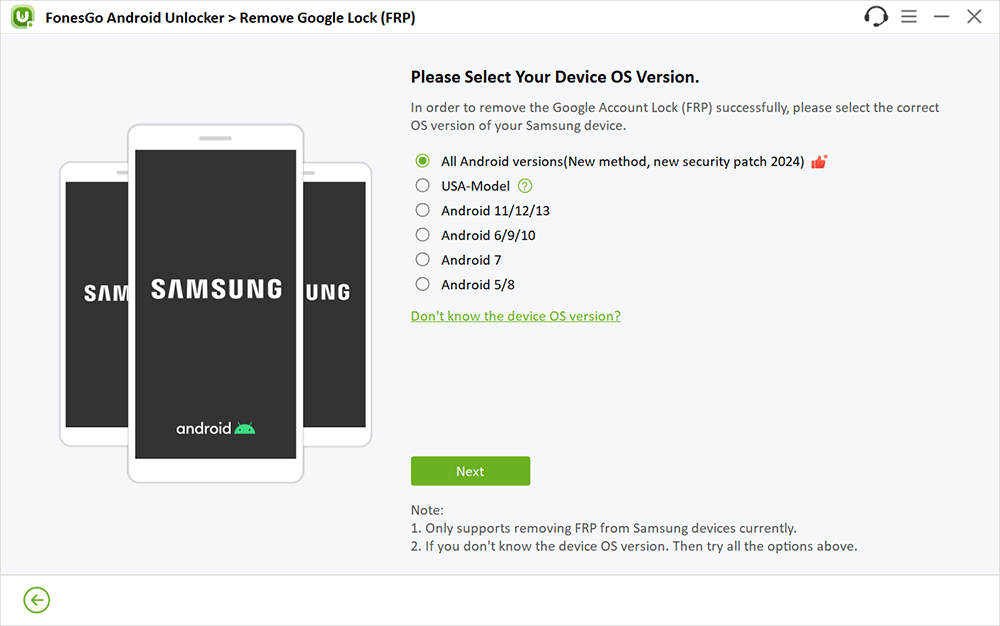
- Step 2 Next, select the first or second option and press the “Next” tab to proceed. You can also select other solutions based on your Android version.
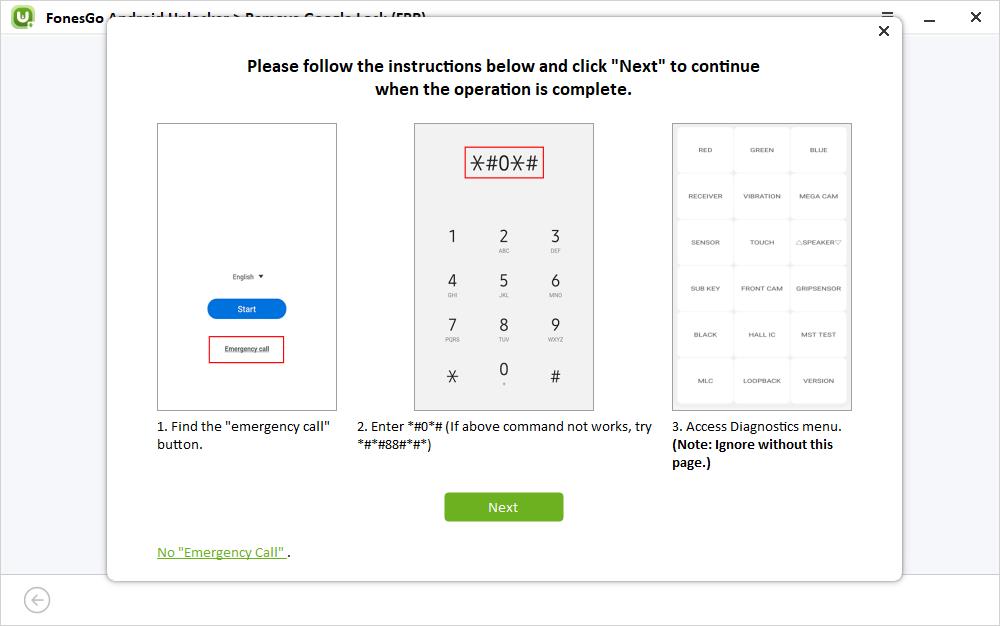
- Step 3 Open your Google-locked Samsung phone and return to the Welcome screen. Press the “Emergency Call” button and type the secret code to access the “Diagnostics” menu.
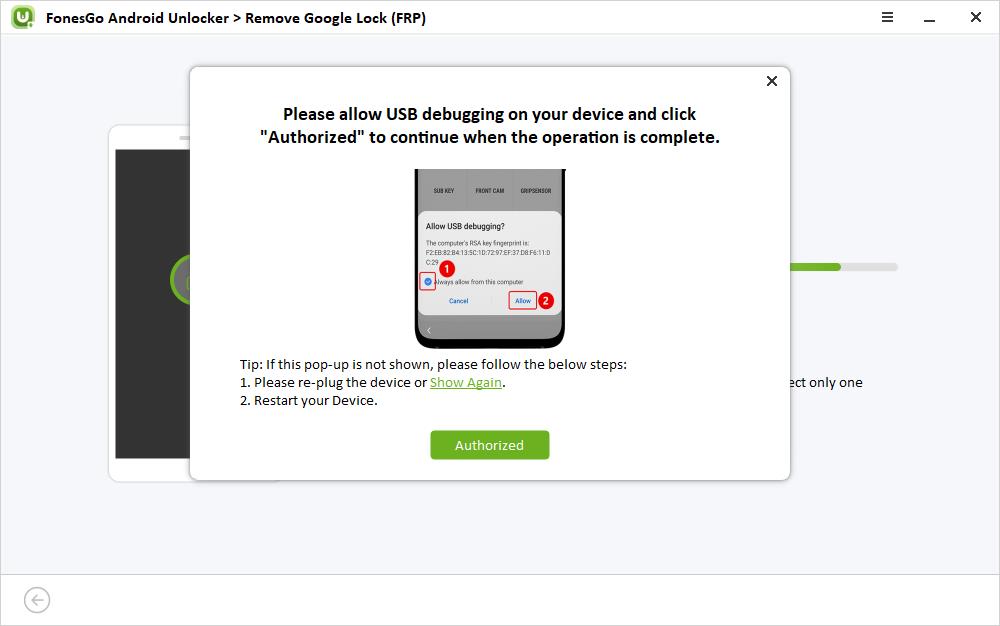
- Step 4 Later, you will be prompted to enable USB debugging. Click “Allow” on your Samsung phone and “Authorized” on the computer.
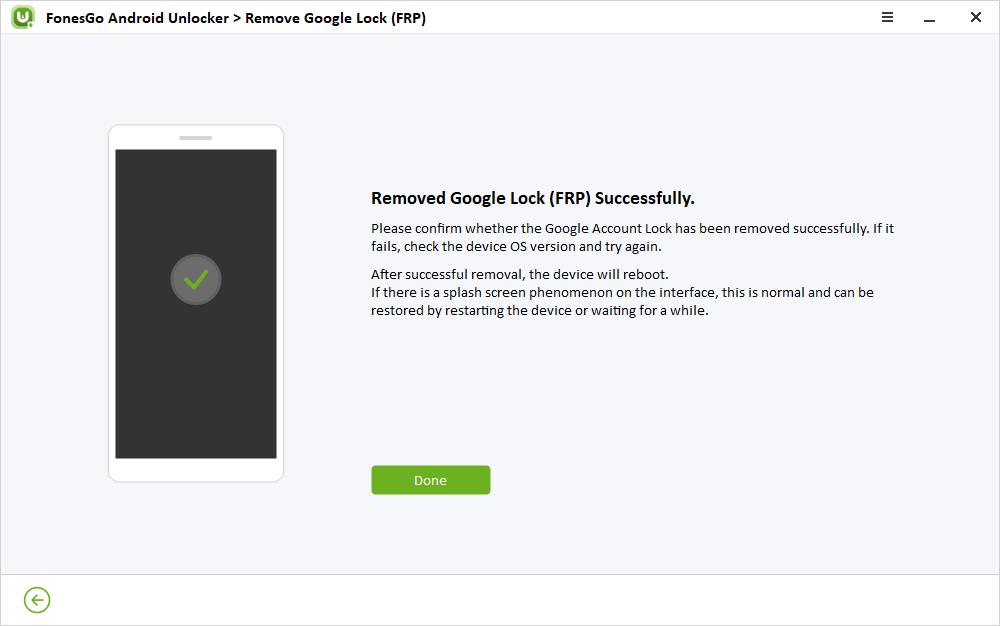
- Step 5 This tool will start removing the Google Device Protection from your phone. Wait for a few seconds, and your Samsung phone will reboot automatically. Now, access your phone to enjoy all the features.
Conclusion
This post has explained the intricacies of the Knox Cloud service in detail, with the reason for getting the “This phone is protected by Knox cloud service” message and how to remove this security feature for personal use. However, securing authorization from your organization is important.
In addition, if Google Device Protection is enabled on your Galaxy phone, try using FonesGo Android Unlocker. Its Bypass Samsung FRP feature offers a secure and efficient solution to get back access to your phone without hassle!

