Including a location on Instagram is a great way to make your posts eye-catching and increase the chances of people finding them. Your Instagram location can affect how the app works in different areas. Some features may be locked if your location is set incorrectly.
Fortunately, you can include a location in your posts, business profile, or create your own location. In this guide, we’ll show you exactly how to add location on Instagram on both iOS and Android devices.
Part 1: Why Use Location on Instagram Posts
Tagging a location on Instagram shows your followers where your photo or video was taken. It makes your posts more engaging and easier to discover. You can even add a custom location to highlight unique spots and make your content stand out.
Key Benefits of Using Location on Instagram:
- Boost engagement by letting followers know where your content was captured.
- Improve post discoverability through location-based searches and feeds.
- Promote businesses, events, or unique spots to attract local audiences.
- Create custom locations when the desired spot isn’t listed.
- Build authenticity and context for your content.
Part 2: How to Add Location on Instagram
The use of Instagram location settings allows you to either tag the exact location or create a custom one for your post. Here is the respective procedure for both new and existing posts.
1. Add Location to a New Post
When you tag a location on your Instagram post, it is a wonderful thing for travel photos, food posts, or even for marketing your business. The tagging tells your audience exactly where the action is and at the same time it also increases the post’s reach.
▼ Steps to add a location on a new post:
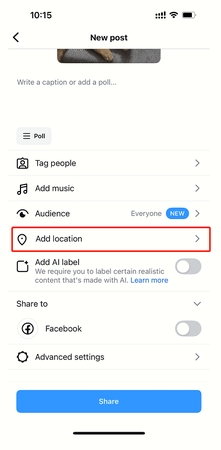
- step 1: To start with the Instagram application, at the bottom tap on the + icon (plus). Post is the option you should go with, and then on the next screen, pick the image or video you want to upload. After that, tap “Next”.
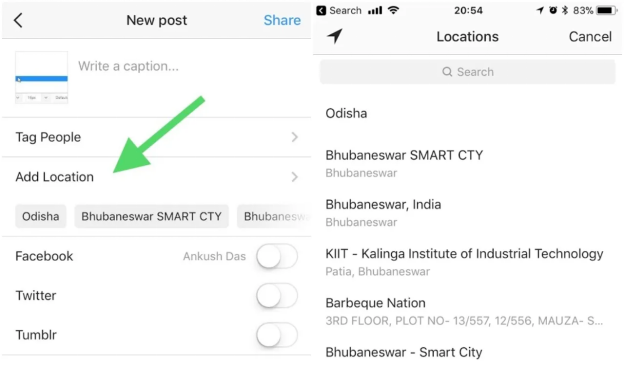
- step 2: Then, go below the caption box and tap “Add Location” to search for your place.
- step 3: Write the location’s name in the search bar. Instagram will offer you locations according to your area and the previous searches. Choose the right one.
- step 4: After adding your location, finalize your caption, hashtags, and tags; then tap Share to post it along with the location tag.
2. Add Location to an Existing Post
Adding a location to your post is not a big deal if you make a mistake. Thanks to the Instagram location settings, you can edit your post, and adding or removing locations is allowed even after it is shared.
▼ Instagram location create to an earlier post:
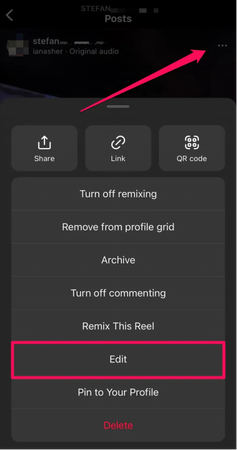
- step 1: Go to the post that you want to edit and tap “Options” (three dots at the top right corner of the post).
- step 2: Select “Edit” from the list.
- step 3: Click on “Add Location”, type in the name of the place you want, and choose it.
- step 4: Hit “Done” to apply the changes you made. The location will now be visible on your post.
Part 3: How to Add Location in Instagram Stories
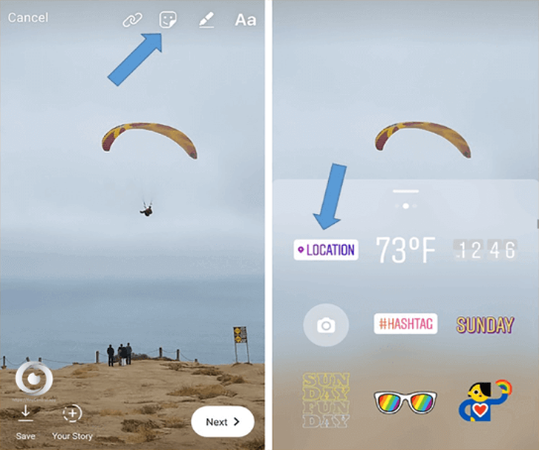
With Instagram location creation, you can tag real places or popular spots easily. Use this Instagram location guide to include a place to your Stories:
- step 1: Start Instagram on your smartphone.
- step 2: Swipe left from your feed to reach the Story camera. Capture a new photo or video or choose one from your gallery.
- step 3: Tap the sticker icon (smiley face) at the top of the screen.
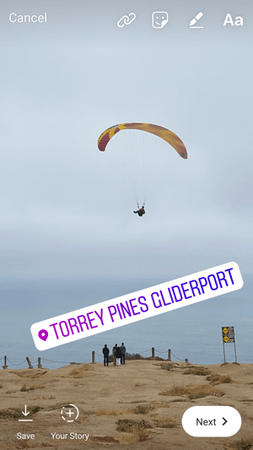
- step 4: Tap Location and then either choose one nearby or enter the location you desire.
- step 5: Move or resize the location sticker as you like, then tap Your Story to post.
Part 4: How to Tag Location in Instagram Reels
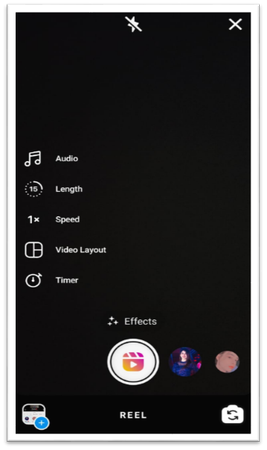
Your Instagram Reel can be made more fun and easier to find by adding a location. It works great if you’re sharing travel, food, or just something interesting from your day. Here’s how instagram location works on reels:
- step 1: Click the + sign and select Reel.
- step 2: Make a video or use the one from your photo gallery.
- step 3: Add music, effects or stickers if you want to enhance its appearance.
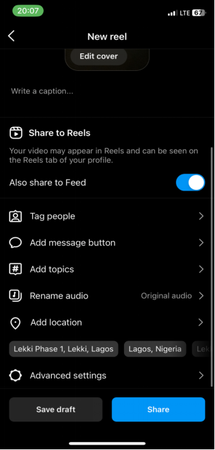
- step 4: On the screen where the caption is, press Add Location.
- step 5: Search for the location you want and select it.
- step 6: Check everything and tap Share to post your Reel with the location.
✅ Learn More: How to Turn Off Instagram Location Tracker for Privacy?
[Bonus Tip] Use Instagram Locations Like a Pro – FonesGo Location Changer
You can change and share from anywhere in the world with FonesGo Location Changer instantly.It’s also good for keeping your privacy safe, having fun with your posts, or visiting imaginary places.
You can smoothly teleport your spot in just a few seconds, add lifelike movements, and thereby make your content more captivating. FonesGo makes Instagram location tagging effortless, giving you flexibility and freedom like never before.

- Teleport to any place instantly.
- Simulate movement along custom routes.
- Works with Instagram, Snapchat, and other location-based apps.
- Supports iOS and Android devices.
- Control location speed and movement for realism.
- Easy one-click setup with intuitive interface.
How to Use FonesGo Location Changer without PC (Teleport Mode):
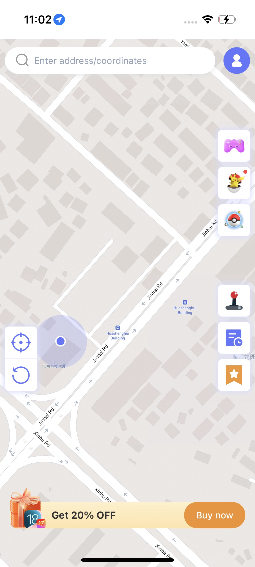
- step 1 Install FonesGo Location Changer to your iPhone.
- step 2 Launch the application and see where you are on the map.
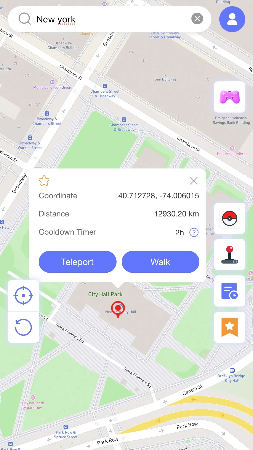
- step 3 Enter the location or coordinates that you want in the search bar.
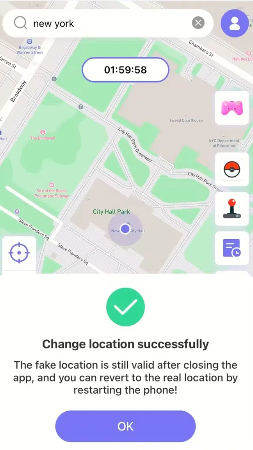
- step 4 Hit Teleport, set up a VPN if asked, and your location will always be updated in a flash.
Conclusion
In this article, we see how to add a location on Instagram and make your posts more lively. Posts, Stories, or Reels with location tags are not only telling the world where you are, they also help your followers discover the places you visit. For extra control, FonesGo Location Changer lets you set your location safely, giving you freedom and protecting your privacy. With this, your Instagram becomes more fun, creative, and personal.

